The Darkroom Project
December 2019
We plan to move house in the new year, so this darkroom information is going to be archived. The new darkroom will probably be constructed in the third garage bay of the new house, allowing for a larger floor space. At the moment the tentative plan is for something 10 feet wide and 12-15 feet long, giving around 10 feet each of enlarger and wet space, plus another 10 feet of work area and storage.
This should allow space for the two Beseler 4x5 enlargers, with one over a drop table. The drop table will allow the 8x10 conversion to produce decent enlargements at a reasonable head height. There should also be space for the Durst M605 which will be dedicated to 35mm up to 6x6 and flashing tasks. One Beseler will do 6x9 and 4x5, while the other one will do 4x5 and sizes to 8x10.
The existing pocket door is going to be recycled. The basic space will probably be a 2x4 frame with an inner plywood skin. At least a partial roof will be needed to allow for the gararge door ceiling rails, and the floor has a standard 1:48 (1/4” in 12”) slope which will have to be accomodated in construction and setting up the sink and benches.
Plumbing will depend on the drainage options. Water should be available.
The 1999 to 2019 Version
Like most amateur photographers I have always wanted a permanent darkroom. Not because of any sense of grandeur, just from the practicality of not having to set up and take down a temporary arrangement. These pictures show the construction and early configuration. The space is bound to be re-organized over time. Information is being added in a near-chronological order as things change.
When my wife and I were house-hunting, the ideal would have been somewhere with an existing darkroom space and all our other requirements for size, location, price (!), and accessibility. We did manage to find somewhere with a convertable outbuilding that already had earthed electrical power. A water supply would not be a problem, but drainage would be neither simple nor inexpensive. After a good number of years using temporary arrangements, this is more of an inconvenience than an obstacle. I work in monochrome, and primarily need the darkroom for printing. Film can be loaded in a changing bag and processed in any location with water and drainage.
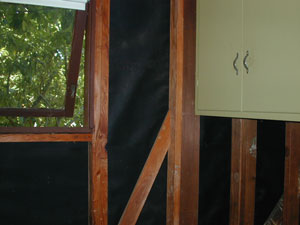
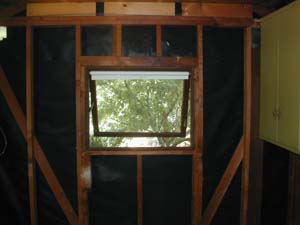
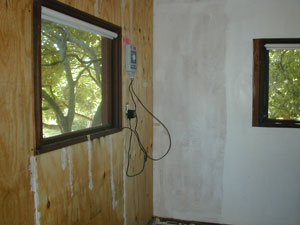
The space we had to work with had a concrete floor and conventional wood and felt-lined walls. Experience over winter had shown that it was weather tight. A number of previous fittings were removed before the construction phase. We needed to retain some general storage space. This, along with the contraints of blackout needs, led to the internal partition wall. This separated the storage at one end of the building from the darkroom itself, and provided a double door design.
The project took most of the summer of 2001, mostly on available weekends and evenings. My brother-in-law, Frank, helped out with the two-person construction jobs. That the project progressed so well is largely due to his experience.
The general room design was dictated partly by the physical space and by the standard wet/dry division. The space is approximately 9 feet by 8 feet (2.75m by 2.45m) with wet and dry benches on the shorter walls and the door in the centre of one of the longer walls. This wall is a constructed partition, which allowed the use of a pocket door (from a local salvage yard). This helped considerably in both saving space and providing light baffling.
The light switch was removed from the outer wall and subsequently mounted on the new partition wall. This switch controls the light in the outer storage area, the darkroom fan, and the main white light which is pull-switched. All other electrical devices are run from a permanently powered outlet source. This arrangement ensures that the fan is on when the space is occupied, and the storage area outside the darkroom is lit for safety.

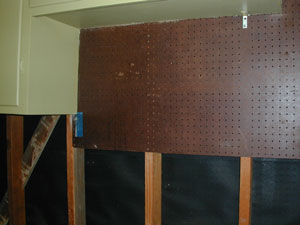
The building was originally timber with an unfinished inside. The inner walls were lined with fibreglass insulation and paneled with half-inch (12mm) plywood. Plywood was chosen over plasterboard / sheetrock for it’s better water resistance and because it allows shelves and equipment to be attached to the wall without hunting for a stud. We did take the precaution of marking the stud locations at floor and ceiling where the dry bench was to be fixed.
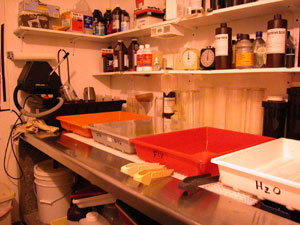
The wet bench is a stainless steel and galvanised unit that came from a local salvage yard. It was probably custom made for a restaurant. It includes a wide shallow sink with drain. The sink has a convenient lip that takes a plastic mesh (This material is intended as a fluorescent light diffuser, and came from a home improvement store) that acts as a draining surface for trays. It also allows trays larger than the sink space to be used. Four 12 x 16 inch trays are the maximum for side-by-side use, but that’s fine for my routine needs.
The sink drain is run to a holding container that is larger than the fresh water stock containers. The rest of the open under-sink space is used for tray and chemical storage. Spent fixer is stockpiled for later silver removal in order to meet local effluent regulations.
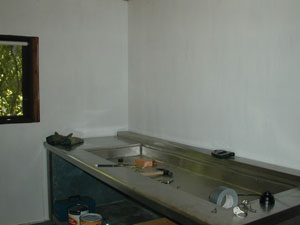
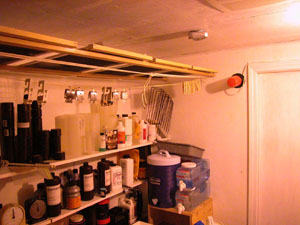
The post-construction picture shows the mesh in place. There is around a foot of clearance at the drain end to allow for the filling of containers from the stock water supply and for ease of tipping away used chemistry. The shelf on the wall provides basic storage for chemistry and graduates. This has now expanded to two shelves, and may not stop there.
Prints are stock-piled in a dish of water before being transfered to another building for full washing in a Versalab 11x14 tank. This tank is actually in the laundry and utility space of the house. The faucet was adapted to take a snap-fit garden hose connector which in turn mates to the standard Versalab connector.
I may move the washer to the darkroom in future. A cold water supply would be easy to provide by plumbing a connector for a hose through the wall. The washer waste could go to the garden as the contaminants are low. The drawback to this is that drying space would still be in the house.
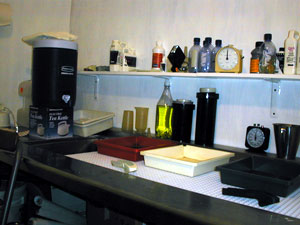
The dry bench (another salvage yard item) is a 3 foot by 7 foot (0.9m by 2.13m) surface mounted to the wall and on diagonal braces. The bench top has steel reinforcement underneath. The final underbench arrangement has not been determined. Rolling plastic carts with drawers will be used for some items. A multi-outlet earthed power strip runs along the back of the dry bench. This connects to the primary outlet. The primary outlet was replaced with a Ground Fault Circuit Isolator (or Residual Current Detector in the UK) to reduce any risks associated with electricity and water in the same space. The white light is controlled by a pull switch.
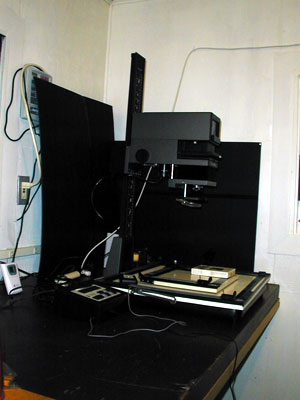
The white and grey box on the wall behind the enlarger is the irrigation control system for the garden. This was inherited from the original function of the building. There was no advantage in moving it.
I have run an extra power lead to the wet side which is used to run a Jobo CPE-2 Plus with Lift. It terminates high on the wall to avoid any risk of splashes, and is only ‘hot’ when in use. The Jobo is too big to set up permanently, so it goes on the wet bench when it is in use. It is mainly used to process 5x4 in large batches - I have two 2553 tanks with 2509n reels which gives me the capacity to process 12 sheets of film in two batches. I still use tubes for individual sheets, and favour stack tanks for roll film.
I have also acquired a 2830 (8 x 10) and a 2840 (11x14) print drums. The 2830 drum with the module extension from the 2840 gives a 2850 (20x16) combination. Although the 2850 is too long for the CPE-2 Plus, it can be hand rolled. It should help with producing large prints in my limited space. I doubt that I will use the smaller drums for monochrome work.

The walls and ceiling were painted semi-gloss white. Once the final enlarger positioning has been decided, local anti-reflection painting will be done. The concrete floor was also painted to reduce the chance of dust generation. The opening window will be retained as an emergency exit, and the glass blacked out. This was done by inserting hardboard panels cut to fit and sealing with black silicone. This is removable should the glass need to be replaced.
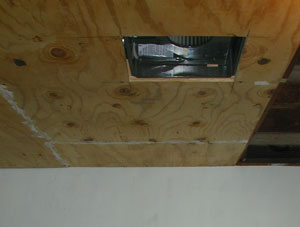
The previously open roof space was closed with a plywood ceiling (about 7’ 6” or 2.28m height) into which is set the extract fan. This is biased towards the wet side to collect more chemical evaporation. The fan vents under the eave at the end of the building via a pressure-opening vent cowl. The fan was slightly over-specified for the room volume, and is a low-noise model. It is a standard bathroom item from the local home improvement store. The one stud width of the partition wall was painted black internally in case an air inlet was required. However it seems the re-entrant slots for the pocket door provide ample air ingress at present. An inlet remains an option. The ceiling was insulated to reduce the effect of winter cold and summer heat. I still need heating (a thermostatically controlled heater set to about 68 F / 20 C) in winter, and cooling (none at present) in summer. I have a remote wireless temperature and humidity sensor from Oregon Scientific that allows me to monitor conditions from inside the house.
Wood coving trim was used to help seal the angles between the walls and ceiling, and between the walls themselves. Broad trim was used to seal around the windows, which was considerably simpler than cutting the wall panels for a close fit.
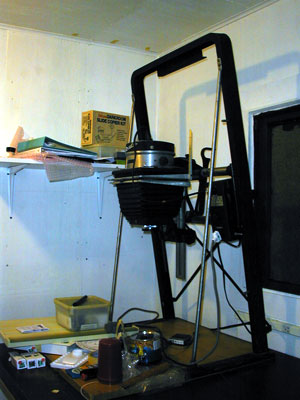
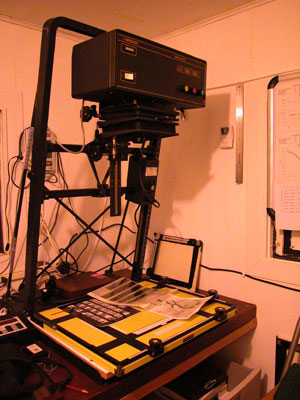
Originally I had planned to use two enlargers - my old Durst F-30 from the 1970’s and the Durst M605 I obtained in 1982. However the loan of a Beseler 45M 5x4 with cold light head may require a re-think. The F-30 may be best used without the enlarger head as a basic copy stand. The Beseler will allow me to play with negatives greater than 6x6cm (typically 6x9 cm and 5x4 inch). The drawback will be that the cold head will not treat my usual Multigrade paper very kindly. At one point I was not sure that it would fit between the bench and the ceiling. Moral: be careful about what you assume during the planning stage!
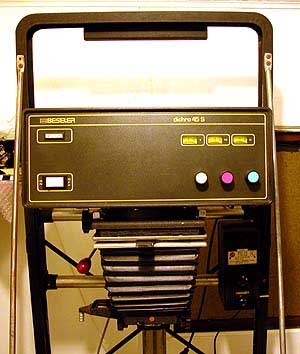
I have now retired the original (and still functioning) Beseler cold light in favour of a Dichroic 45S head which I found locally at a good price. This gives me the option of Multigrade filters without using the head for filtration, or dialing in filtration on the colour head. The halogen lamp is much brighter, and readily available. It is still a diffusion head.
The exchange was simple enough - remove the format scale for the upper bellows (which stays compacted in the 5x4” position with diffuser heads anyway), unlatch the old head, swap, and latch on the new one. The Dichoic 45S head uses one power cable for the cooling fan, and a second power cable goes to the RH Designs Analyser Pro for lamp control. Both the Beseler and the Durst M605 have plugs for the Analyser Pro.
I have adapter leads to convert the IEC male connectors used on some of the Analyser Pro connections back to North American 3-prong plugs. This gives me the option of using a Gralab 300 electric timer on the other enlarger. A controlled white light source can be useful.
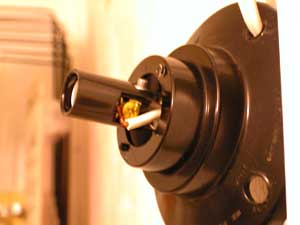
There are three safelights, all tied to the enlarger timer. One is positioned centrally above and behind the enlargers, and the other two are mounted high at either end of the wet bench. Two of them are designed for UK 240V 15W bulbs. I have converted one to use a 15W 120V candellabra screw base bulb, and may do the other one. The modification is reversible.
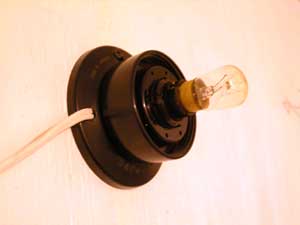
All three safelights have inline switches so they can be controlled independently. This allows the overall illumination to be reduced for long and high sensitivity processes. They can also be connected directly to the power, by-passing the enlarger controller. I can also swap the orange dome of one safelight for a red dome if I have to handle ortho material. Although this level of flexibility is not strictly necessary, there seemed to be no reason not to do it as the parts were available.
The white light is controlled from a pull cord that dangles in the middle of the room and controls a central compact fluorescent bulb. The pull cord is easy to reach - it is a small space - and can be used safely with wet hands. I find I don’t notice it when I walk back and forth.
Updates from December 2009
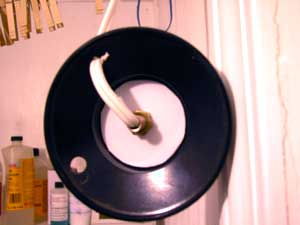
Revised wet bench layout with more shelves, and just enough space for four 12x16 trays. The rails to hold print drying screens are a recent addition. Most of the screens are standard sash window inserts that have been split into two sections. This is proving to be an effective use of the overhead space. The silver object on the ceiling is a battery powered white LED light with a proximity sensor. It is used as a low-intensity white light for judging prints in the fix and as an emergency light. It turns off automatically after 30 seconds.
Revised wet bench layout from the other side. The Jobo is usually turned at an angle when it is in use. Note the extended drain pipe from the lift. There is a small submersible pump in the tank for circulating the tempering water.
A later Beseler MXT chassis, which now has the 45S head. It only just clears the ceiling when fully elevated, as this chassis is slightly taller than the older one. The rear bracing makes it far more convenient to use the Saunders 20x16 4-blade easel. This enlarger is shown configured for 35mm rather then my usual 5x4. The white object on the wall to the right of the enlarger is a wireless thermometer.
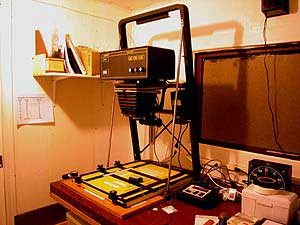
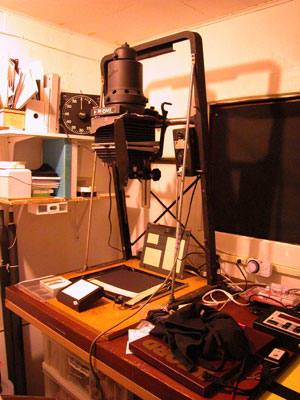
The older M chassis with the condenser head from the MXT. This just clears the ceiling at full elevation. Currently hooked to the Gralab timer. The condensor height scale needs to be refitted (it was removed to fit the 45S head), though setting the right height can be done by inspection. I have a foot switch (the grey cable running over the front of the bench) for times when both hands are occupied. The cable is secured to the enlarger brace with spiral plastic cable wrap. The hook to the back of the enlarger head is for positioning the head for wall projection. The later version does not have this option, though I doubt that I will be using it very often!
This unit now has a second Dichro 45s head as the normal fitting. Having both chassis with the same light source simplifies calibration. The condensor head is back on the shelf in case it is needed.
I have finally managed to move my washing facilities to the space outside the darkroom itself. I still need to add a backsplash and seal in the sink edges, but the drain is plumbed through the wall, and I have a cold water supply. This is intended for print and film washing, not chemical disposal. The ‘grey water’ is being sent to the ornamental part of the garden. The sink has an 11x14 Versalab washer. The Jobo CPE-2 is the second unit which is mainly used for tempering chemicals and for some washing tasks.